Whether it’s our keys, wallets, phones, or backpacks, sometimes things get lost — usually at the most inconvenient times, too. If you’re like most people, you hate losing (or misplacing) things. Fortunately, Apple has introduced a new product that aims to help even the most forgetful among us keep track of our belongings.
Enter the Apple AirTag — your new best friend for keeping tabs on all of your things. In this review, we’ll show you how they work, how to set them up, and some of the best ways to use them.
Apple AirTag Price
To get one of the most common questions out of the way, Apple sells a single AirTag for $29, or a pack of 4 AirTags for $99. Naturally, the pack of 4 offers a better deal by reducing the price per AirTag to about $25.
Depending on your affinity for Apple products, you may be wondering if $29 is a competitive price for this type of item. But when you consider that the largest company in this space, Tile, starts its base-level Mate product at $25, the AirTags feel appropriately priced.
AirTag Design
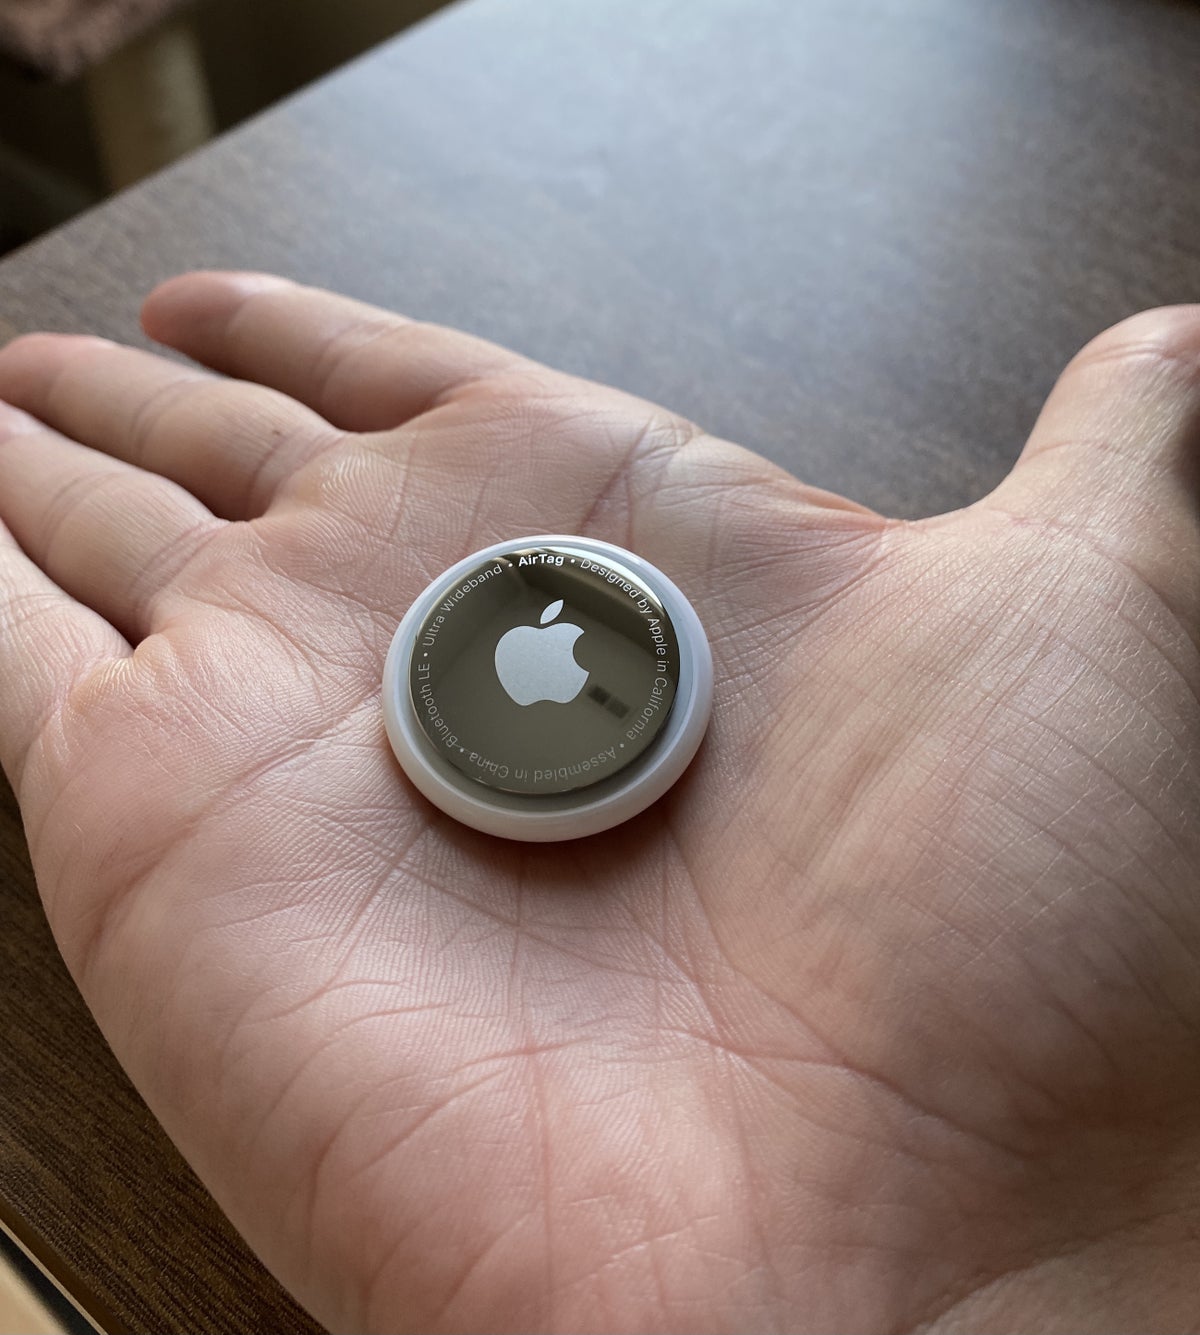
Image Credit: Jarrod WestAt just 1.26 inches in diameter, 11 grams in weight, and 8 millimeters in thickness, the AirTag is quite small — certainly small enough for you not to notice it much on your keys or other items.
For those who are fans of getting Apple products in different colors, Apple offers just 1 color option for the AirTag — with an aluminum finish on the front and white plastic on the back.
To open the AirTag, you simply need to push and twist on the aluminum casing to access the removable CR2032 battery that powers the AirTag. According to Apple, the battery life should last about 1 year but, fortunately, these batteries are cheap to replace. You can get a 4-pack of them on Amazon for about $5.50.
One thing to note though, depending on how you want to use your AirTag, is that you’ll likely need to purchase an accessory like a key ring or luggage tag in order to do so because the AirTag does not come with any clips or built-in holes.
How To Set Up Your AirTag
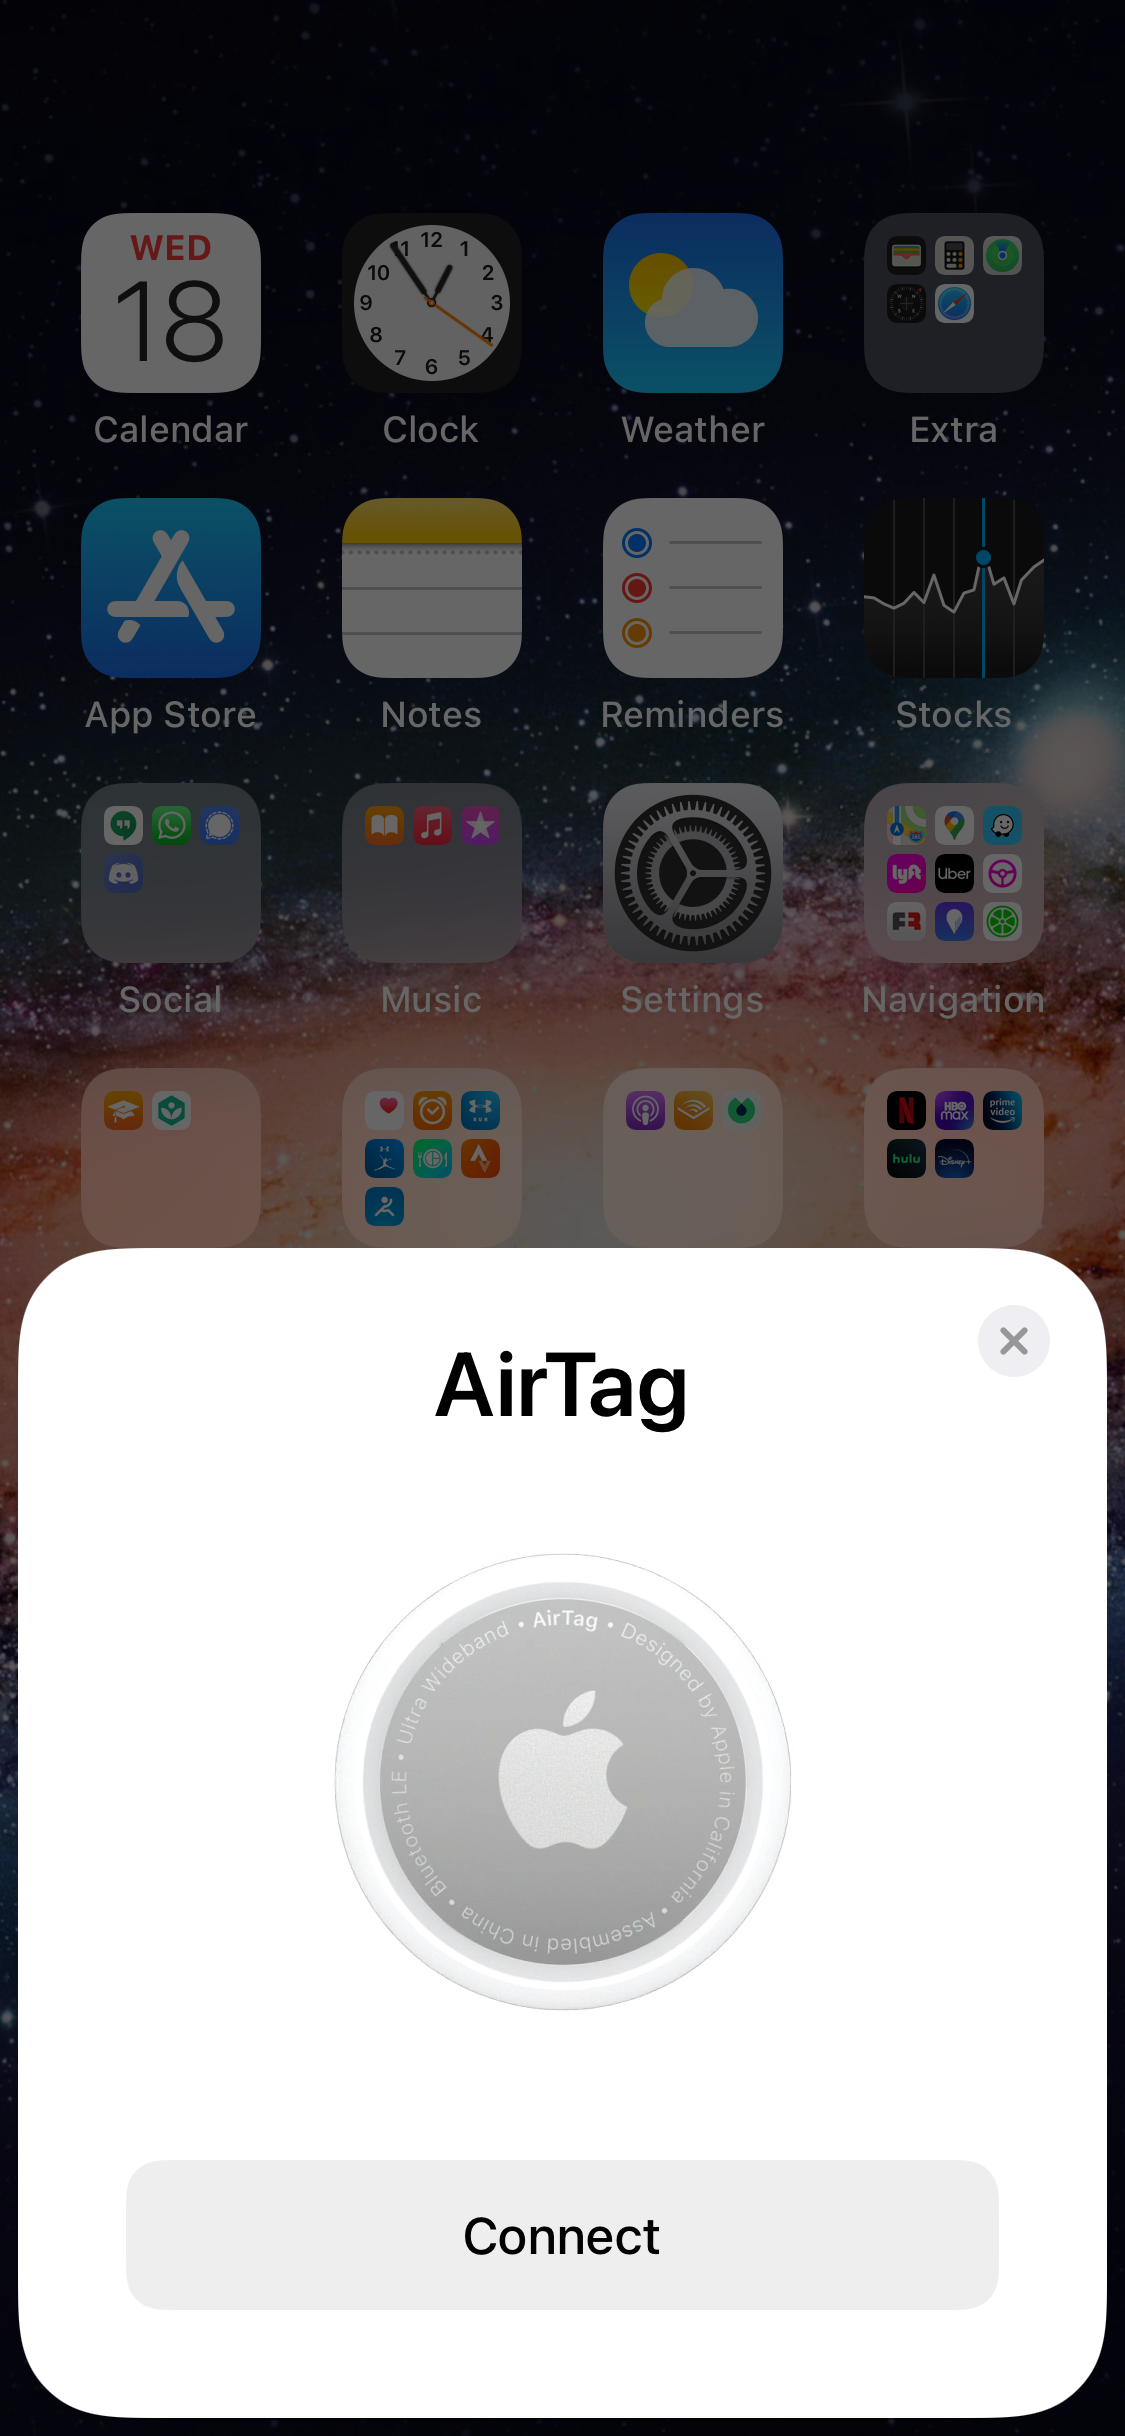
Setting up your AirTag is super simple. All you need to do is open the packaging, remove the plastic covering, and move the AirTag close to your iPhone. From there you’ll almost immediately be prompted to connect your AirTag to your iPhone.
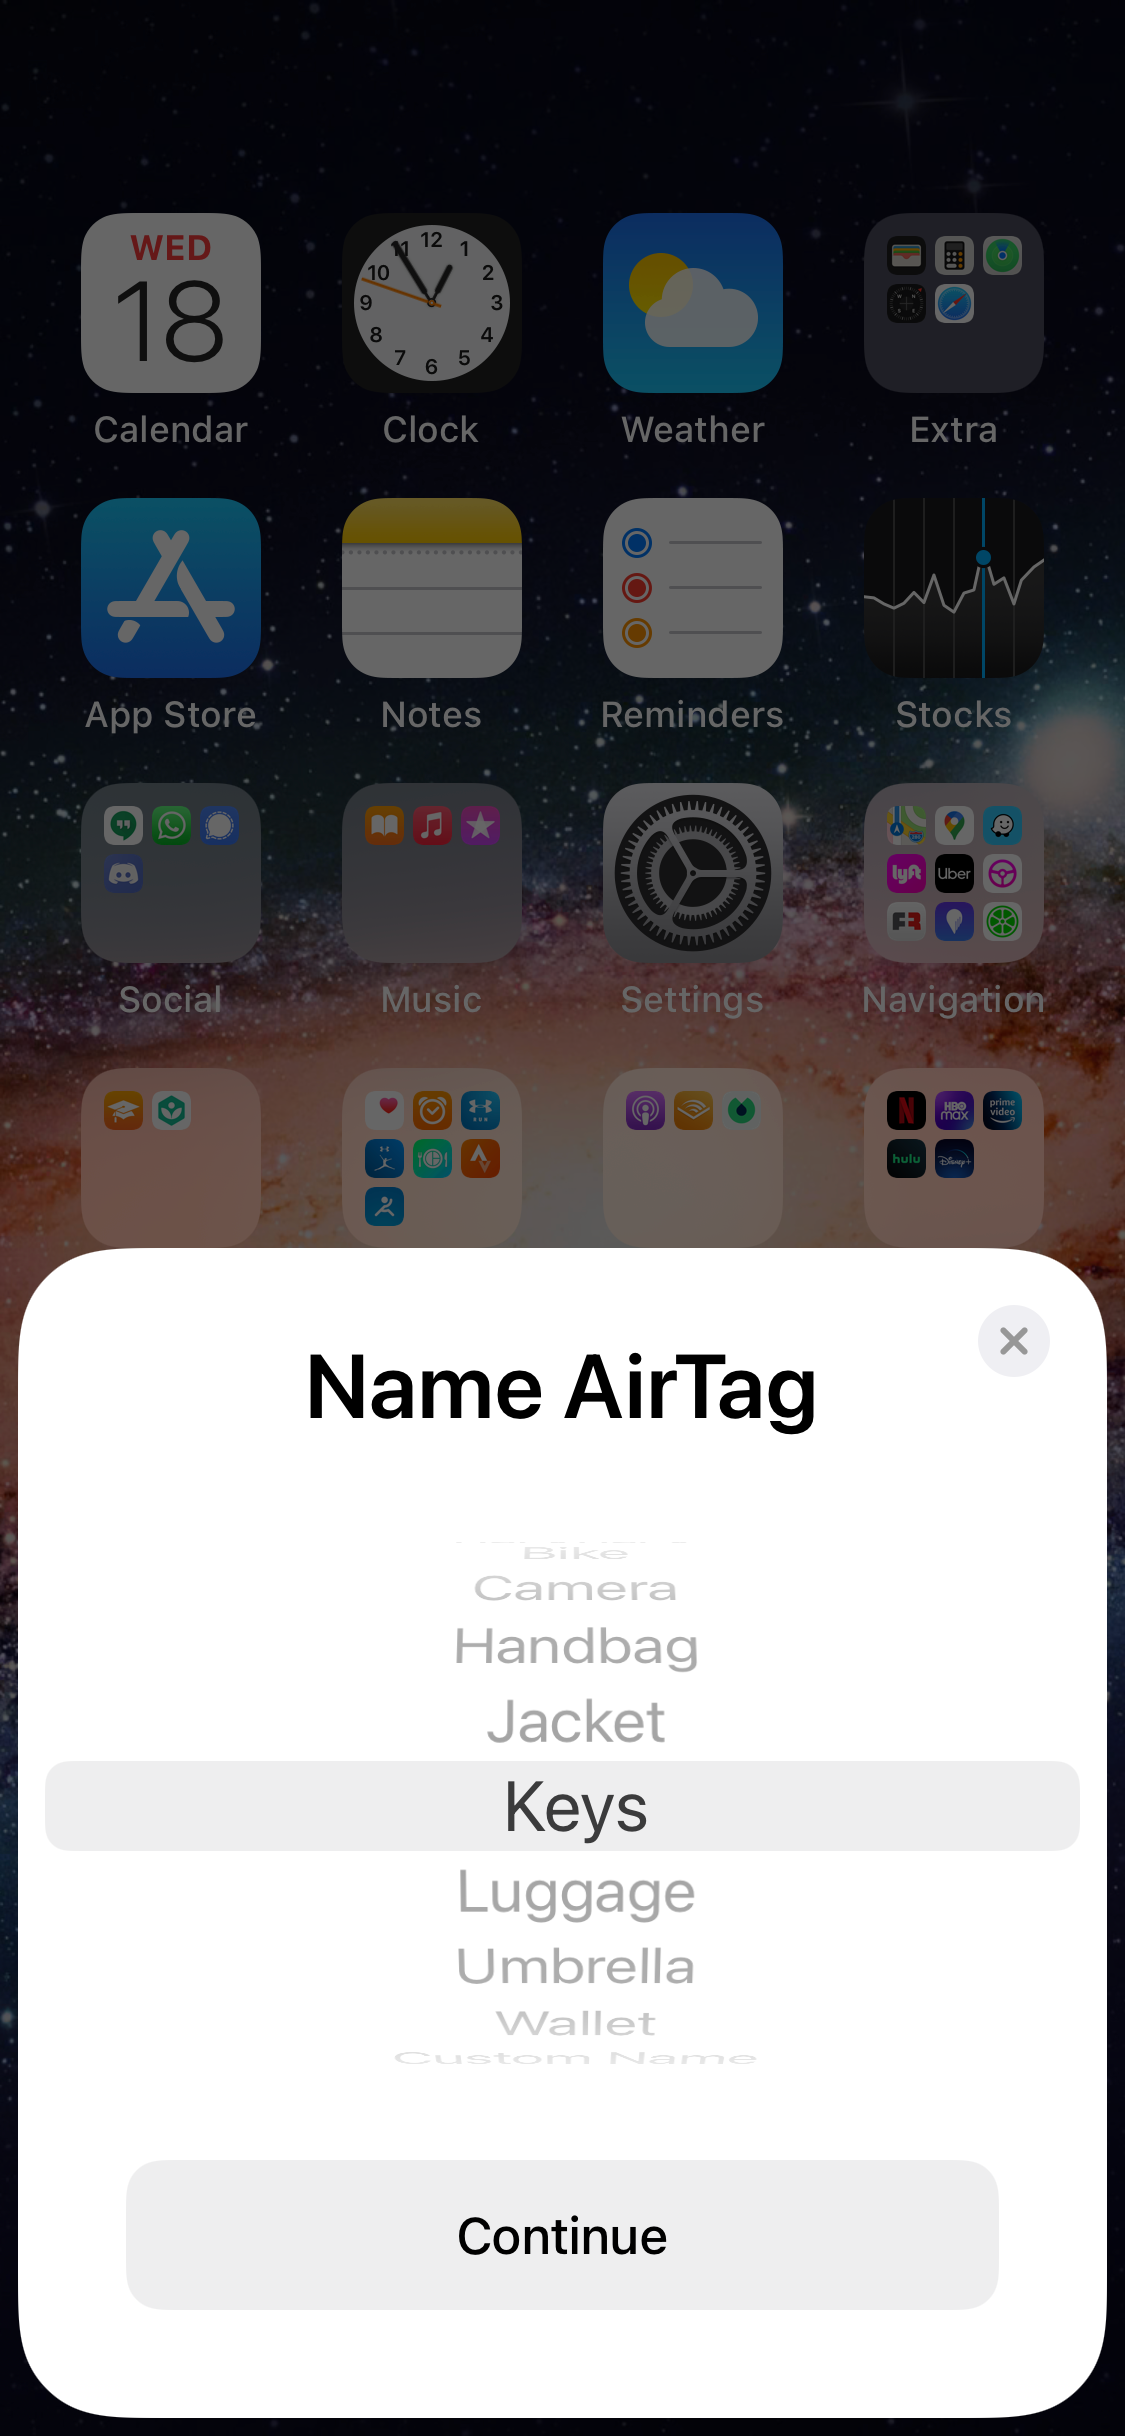
Connecting your AirTag with your iPhone. Image Credit: Jarrod WestThen you’ll get the chance to name your AirTag. You can choose a name from the list of preselected options like Keys, Backpack, Luggage, or you can type in whatever custom name you’d like. Ideally, you’ll want to choose the name of whatever item you’re planning on using the AirTag with.
You can go back and change the name at any time, though, which is especially helpful should you decide to swap an AirTag from one item to another.
Name your AirTag. Image Credit: Jarrod WestFinally, you’ll just need to click to confirm to add your new AirTag with your Apple ID and phone number — and then you’re done!
AirTag Features
Unsurprisingly, the primary feature of an AirTag is to help you locate the item that an AirTag is attached to if you’ve lost it.
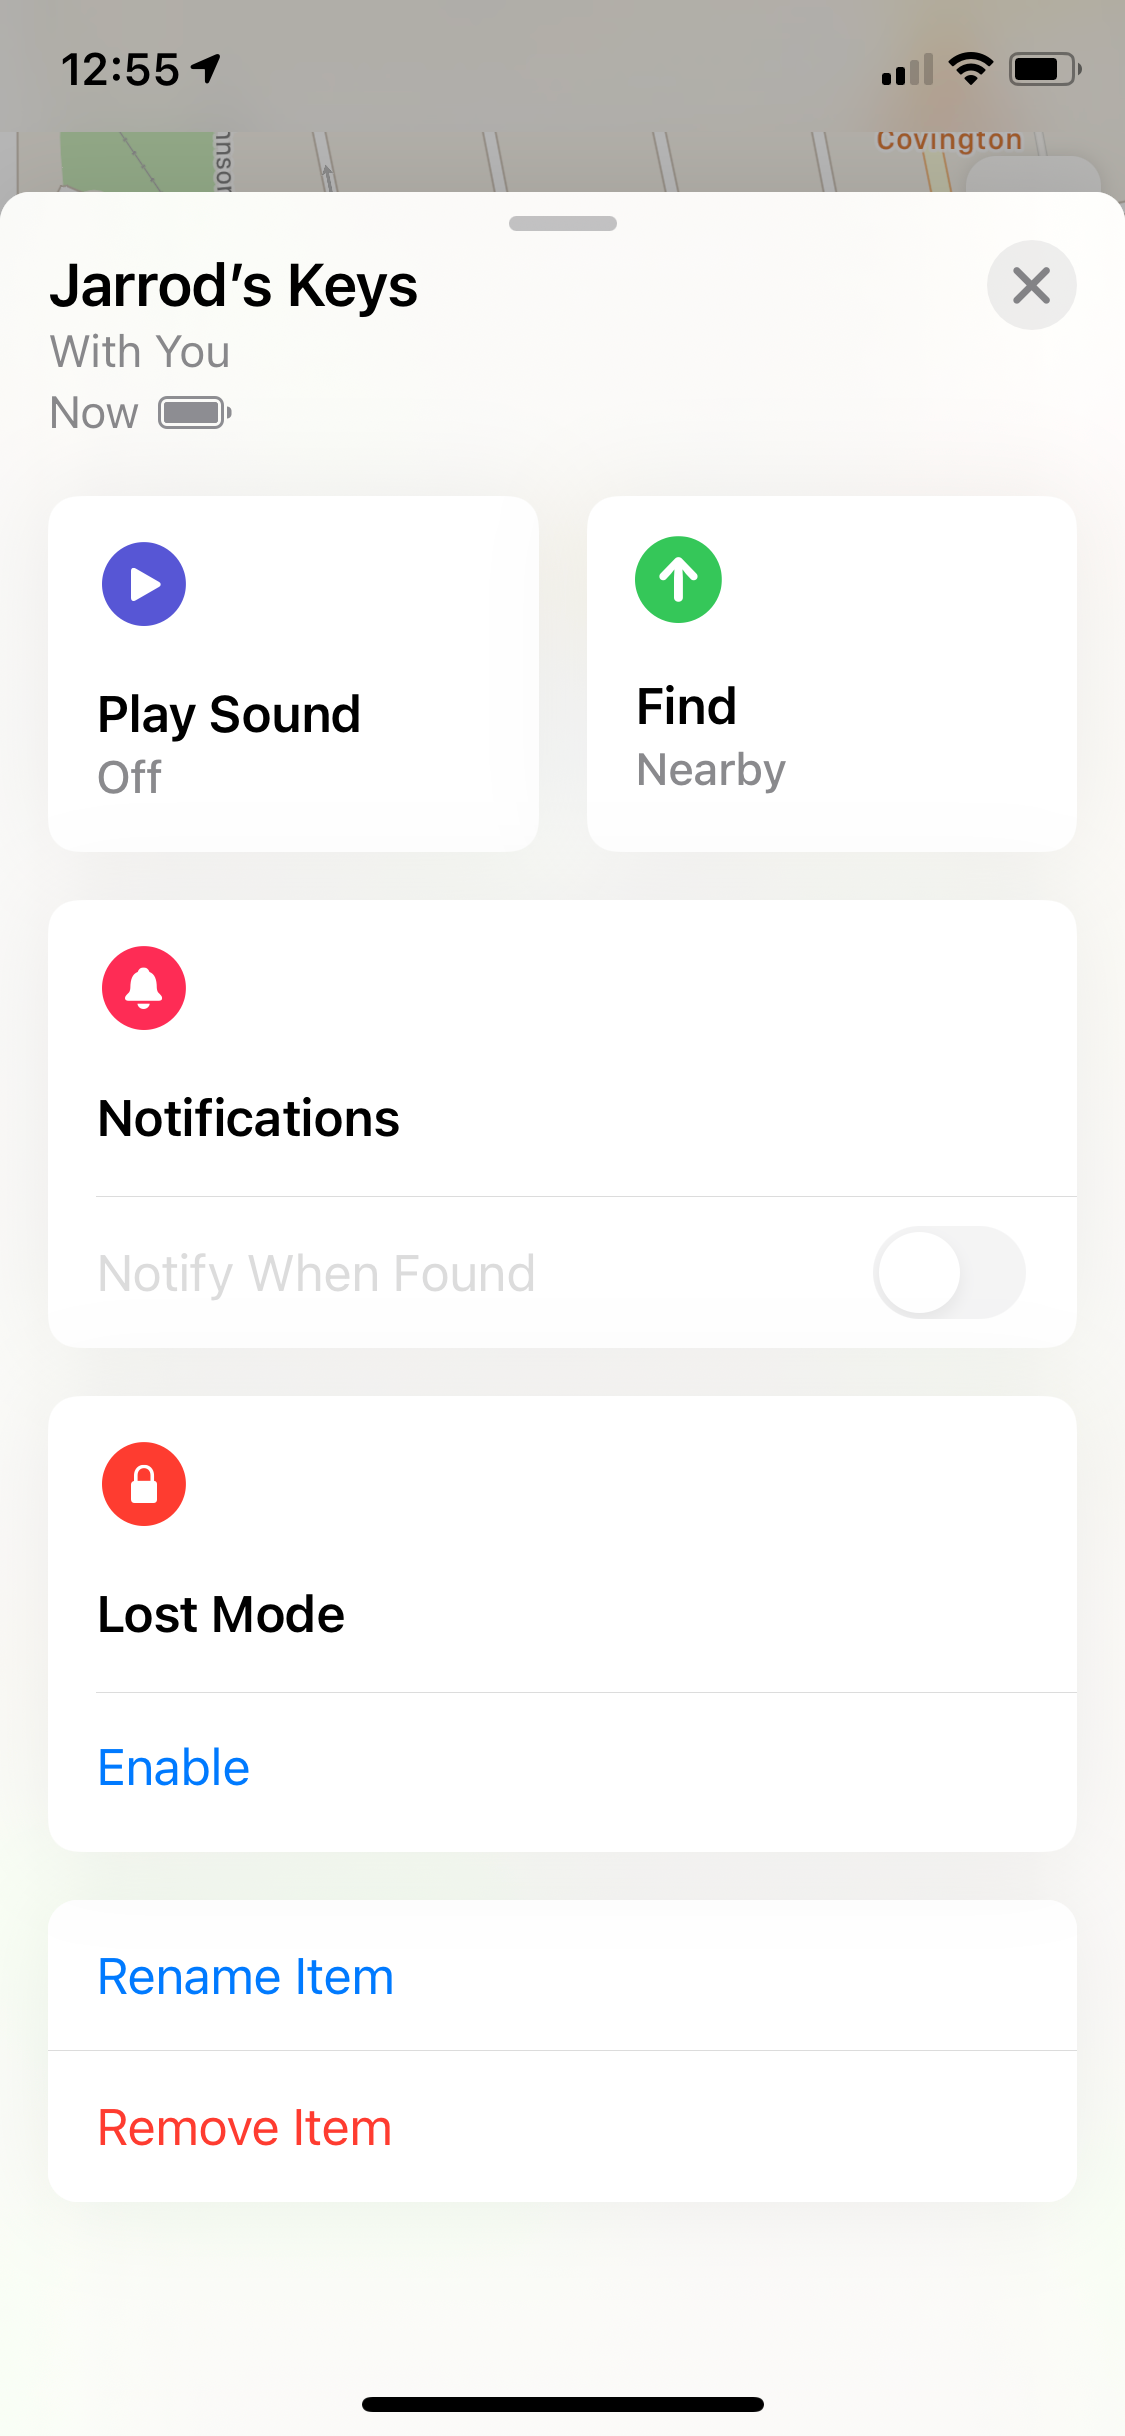
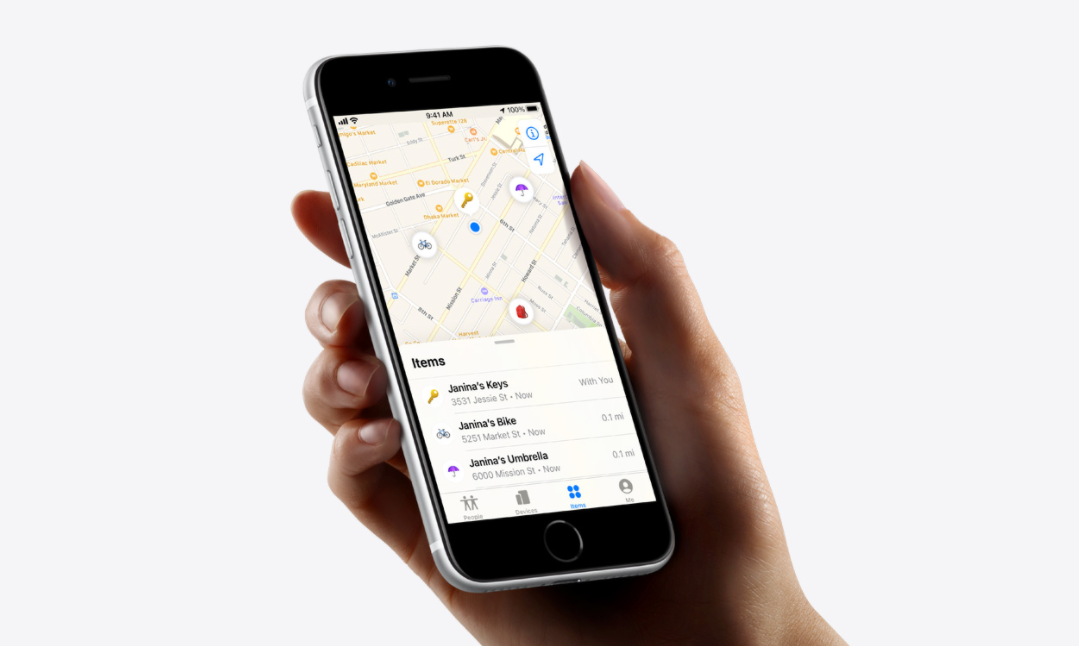
Image Credit: Jarrod WestFrom the Find My app on your iPhone you can select the item you’re trying to find, which will lead you to a homepage with 2 primary options: Play Sound and Find.
Selecting Play Sound will emit a jingle to help you hear your item if it’s nearby but out of sight.
Selecting Find pulls up a helpful guided tool to show you both how far, and in what direction, the item is from you — making it easy to track down if you can’t hear the sound notification or are hearing impaired. In our testing, we found that you need to be within 30 feet or so of your item for the Find function to work, otherwise, the app will let you know that your item is further than that.
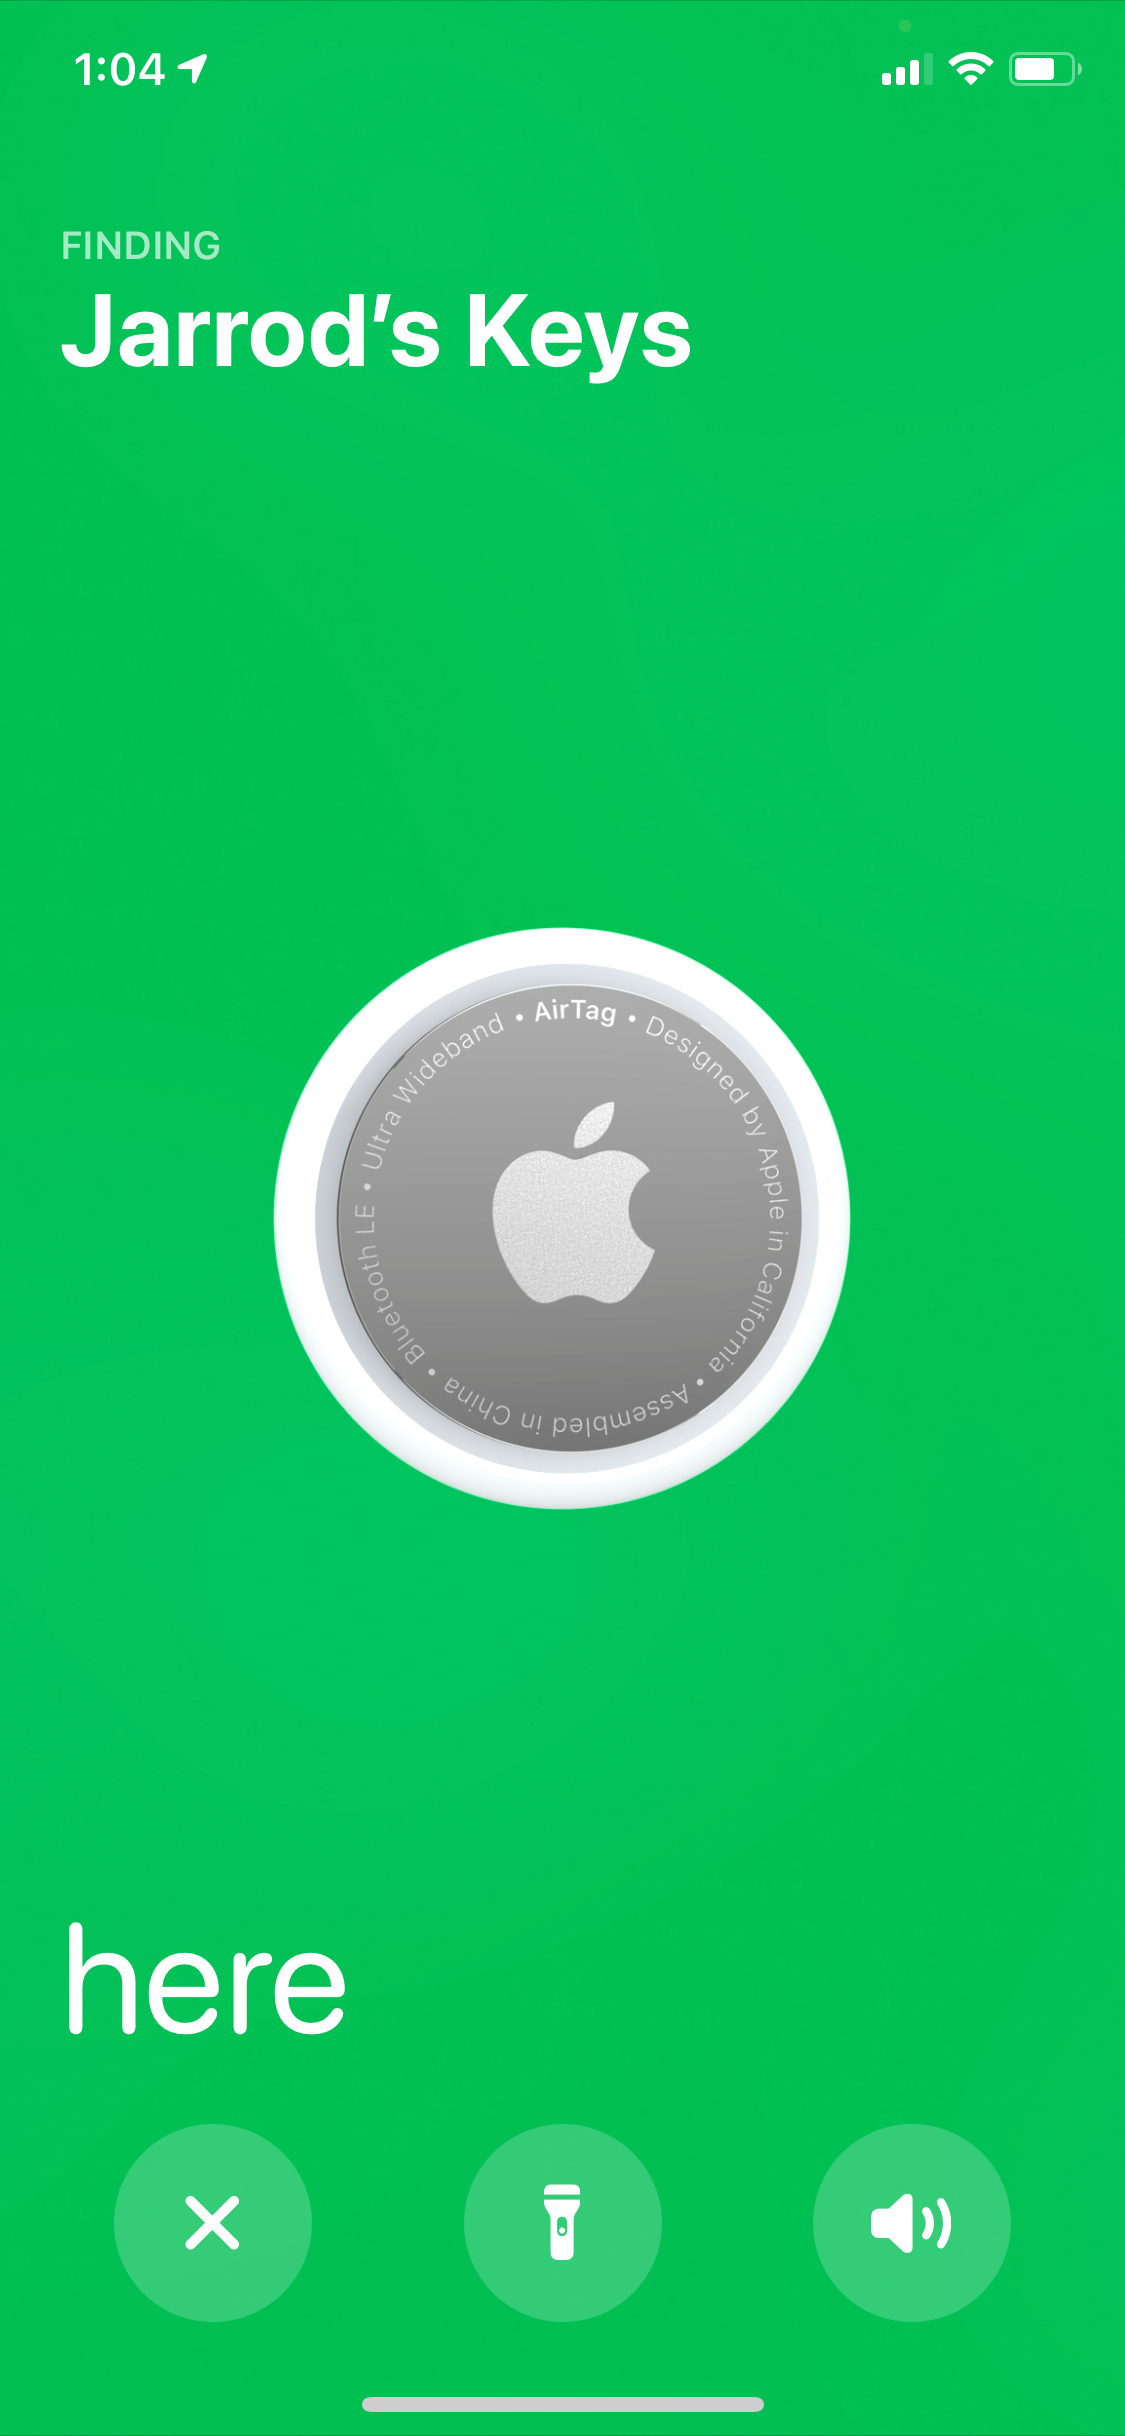
Image Credit: Jarrod WestOf course, once you get close enough to the item, the app will let you know that you’ve found it.
Image Credit: Jarrod WestIf you have no idea where your lost item is, you can enable Lost Mode — this will notify you if the location of the item becomes available, and allow you to leave a phone number or email for the person who finds the item to contact you.
But even if your item is completely lost, there’s still hope you could locate it thanks to the Find My Network. Essentially, every iPhone that has opted into the Find My Network will effectively function as a tracking beacon to help locate your AirTag.
Here’s how this works: If your AirTag is within the proximity of another Apple device that is part of the Find My Network, your AirTag will ping its location to that person’s device, which should allow you to see your AirTags exact geo-location.
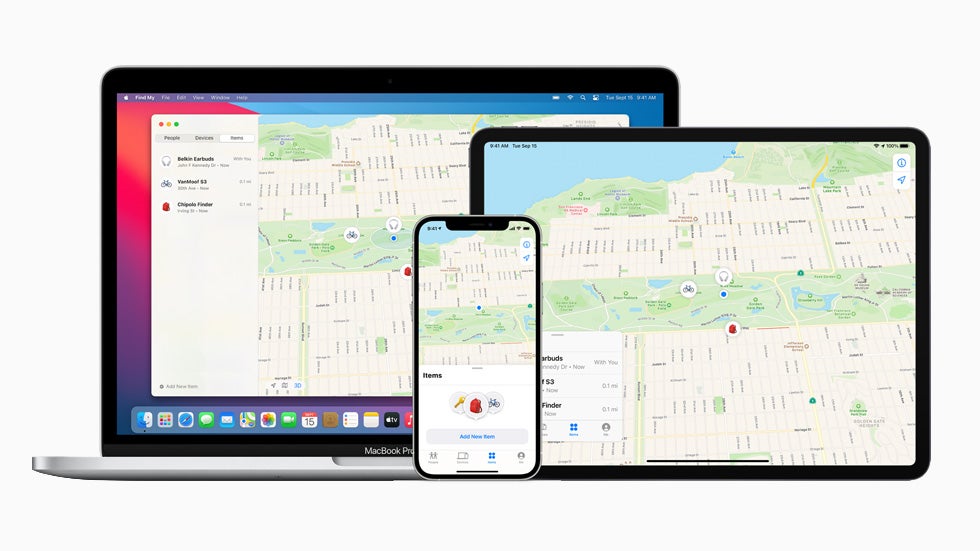
Apple Find My Network. Image Credit: AppleFor instance, if you left your backpack in a coffee shop across town, and it had an AirTag inside, any person who visited that coffee shop with an Apple device that’s a part of the Find My Network would allow you to see the exact location of your backpack from your app. Pretty awesome right?
Safety
You may be wondering that if the tracking capabilities are so good, what is there to prevent someone from slipping an AirTag on someone to track that person wherever they go?
Fortunately, Apple has thought of a solution to this. If there’s an AirTag that’s not synced to your device that’s near you for an extended period of time, your iPhone will send you a notification letting you know. Don’t have an iPhone? Then the foreign AirTag will emit a beep every so often to let you know it’s nearby.
While neither system is entirely foolproof, it’s certainly better than the security features of many other tracking devices.
10 Ways To Use an Apple AirTag
Okay, so the AirTag is basically a tracking device, but how useful would that be exactly? How many ways can you actually put it to good use? Let’s look at 10 of the best ways to do so:
1. Attach an AirTag to Your Keys
One of the most obvious ways is to use an AirTag is to attach it to a set of keys. If your keys are something you misplace often, the use case doesn’t get much better than this.
Hot Tip: If you have an AirTag on your keys but keep them in another item like a backpack or purse, you’ll effectively be able to keep track of 2 things at once.
2. Toss an AirTag in Your Luggage
Unless you have a very unique set of checked luggage, many checked bags can look very similar (i.e. square and black). Having an AirTag in your bag won’t just be helpful in telling you when your bag is being placed on the carousel, but also if anyone should happen to grab your bag and start walking off with it (accidentally or not), you’ll quickly be able to track it down and prove that they have your bag.
3. Give an AirTag to Your Child
Any parent can understand wanting to keep be able to keep an “eye” on their child, even when they’re out of sight. Fortunately, an AirTag will allow you to do just that. You could have them keep one in their pocket, or place one in their bag to give yourself the peace of mind of always knowing where your child is.
4. Put an AirTag on Your Pet’s Collar
Pets are like family, so naturally, you want to make sure you can easily track them down if they happen to go missing. Adding an AirTag to your pet’s collar is a perfect way to do just that. Better yet, if your pet is lost and you can’t find their location on Find My, you can enable Lost Mode on the AirTag and provide your contact information for whoever ends up finding your furry friend.
5. Leave an AirTag in Your Car
If you regularly park in a parking garage or frequently forget where you parked your car, tossing an AirTag in your car will help you pinpoint your car’s exact location using the Find My map.
6. Pop an AirTag in Your Wallet or Purse
If there’s something you definitely don’t want to lose, it has to be your wallet or purse. From cash to credit cards to your ID, there are plenty of things there that you surely do not want to lose. Placing an AirTag in either will help you find it if it’s lost somewhere, or even if it’s just hiding underneath the couch.
7. Keep an AirTag in Your Backpack
Use the Find My App to track down any item. Image Credit: AppleIf you keep a handful of important things in your bag — such as a laptop, chargers, keys, wallets, and, well, anything really — then keeping an AirTag in it is definitely a good idea. For instance, if your bag were to be stolen, you could contact the police and show them its exact whereabouts.
8. Affix an AirTag on Your Bike or Scooter
For those who commute around their city on a bike or scooter, adding an AirTag to your ride can both help deter theft or help you retrieve your property if it does happen to get stolen.
9. Use an AirTag To Track Down Your Drone
If you use a drone for photography (or even just for fun) sticking an AirTag to it can be a huge help in the event that it crashes or gets stuck somewhere and you’re unable to find it. Given that many mid-level consumer drones have a range of up to 1.5 miles, having a way to track it down should you lose sight of it could be a huge help.
10. Never Lose Your Remote Again With an AirTag
If there’s one thing that always seems to be lost, it’s the dreaded TV remote control. Now you have a solution to make sure your remote never stays lost for long again! Simply stick an AirTag to the back of your remote and you’ll no longer need to dig through the depths of your couch to track it down.
Final Thoughts
As you can see, the Apple AirTags are a great option for anyone looking for a device to help them keep track of their most important items. Not only are they easy to set up and easy to use, but they’re reasonably priced, especially when compared to other device trackers on the market.
If you’re a part of the Apple ecosystem and you’re tired of misplacing things, Apple AirTags are probably a perfect fit for you.