If you’ve traveled much at all, you’ve likely heard of the Global Entry program. With all the fuss about waiting in lines at the airport, people are very curious about any way to beat the system.
In this article, we’ll answer all your questions and help you get signed up for the program so you can speed your way through customs and get to your final destination!
What Is Global Entry?
For those who frequently travel overseas, you know how difficult it can be for an international traveler to get through customs upon arrival.
To lessen the pain while dealing with an ever-increasing number of security risks, the U.S. government created a program called Global Entry that gives preapproved clearance to low-risk travelers entering the U.S.
Currently, this program is 1 of the 5 available Trusted Traveler Programs. Four of these are designed for personal and business travelers (Global Entry, SENTRI, NEXUS, and TSA PreCheck), while 1 is for commercial trucking (FAST).
All programs except TSA PreCheck are governed by the U.S. Customs and Border Protection unit (CBP). As its name implies, TSA PreCheck is administered by the Transportation Security Administration.
The CBP Global Entry program first originated as INSPASS in the 1990s. After the CBP merged with the Immigration and Naturalization Service (INS), it created the current program in its place.
Initially, the program was only offered at John F. Kennedy Airport (JFK) and Newark Liberty International Airport (EWR) but has since been expanded to over 58 U.S. airports and 17 preclearance international airports. Over 10 million people are currently enrolled, and it’s estimated that there are 3.5 million applications each year.
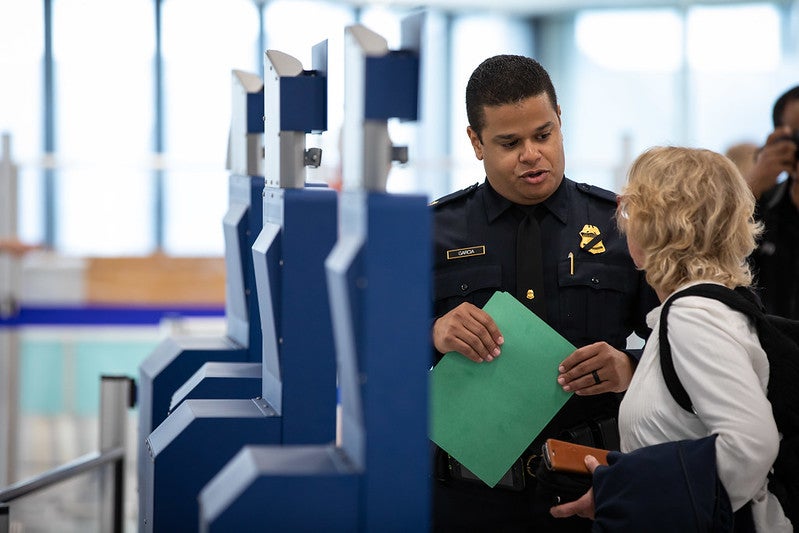
To eliminate waiting, member information is stored in a database. When members enter the country through a participating airport, they scan their machine-readable passports and fingerprints at a kiosk, complete a customs declaration form, and proceed straight to the baggage claim area.
Bottom Line: A frequent traveler program will save time, mitigate stress, and simplify travel! Members get to skip all of the typically long customs lines and get to their destination more quickly.
How Much Does Global Entry Cost?
All applicants must pay a one-time fee of $100, even those under the age of 18. If you’re rejected from the program for any reason, you will not get your $100 back.
To hedge your bets, make sure to get your fee reimbursed by carrying cards such as The Platinum Card® from American Express or Chase Sapphire Reserve®.
Remember that along with your approval, you’ll also get access to the TSA PreCheck Trusted Traveler Program, which itself is valued at $85.
Can I Get My Membership Paid For?
Since we’re in the world of getting great travel benefits for little cost, what would this article be without a section on helping you get your membership cheaply?
There are a lot of rewards cards that offer credits towards the fees. To receive the credit, you must pay your Global Entry fees with 1 of those cards to get the fee reimbursed on your next statement.
Here are a few of our favorite cards that will reimburse you for the Global Entry fee:
If you have 1 of the above cards but don’t need the credit, you can always try to pay for someone else’s application! Share the love and make everyone’s travel easier.
You should also note that many of these cards will extend the credit for additional cardholders if you add them. While this may cost money in some cases, the $100 credit certainly helps offset that.
Sharing Your Credit
Many people ask or wonder about sharing your Global Entry credit from 1 of the above cards if you’ve already purchased your membership. The answer is yes, you can always pay for someone else’s application, as the charge shows up as a generic charge and isn’t attached to your name.
You may want to consider whether or not you’ll want to use that credit in the future, however, since it’s only good once every 5 years.
Another option is to add people as authorized users to your existing cards that offer it.
For some cards, like the Amex Platinum card or Chase Sapphire Reserve card, your authorized users also get access to the Global Entry credit. Just make sure it makes sense to do so, as you will likely be charged an extra fee for the additional cards.
The bonus, however, is that your authorized users will also get access to things like Priority Pass lounges and some of the other card benefits!
Other Ways To Pay for Membership
Platinum and Diamond Medallion members with Delta Air Lines may also get a $100 Global Entry voucher if they choose it as part of their Choice Benefits.
The NEXUS program with Canada offers Global Entry benefits and expedited U.S.-Canada border crossing. The best part? This fee is only $50. However, your NEXUS fee may not be reimbursed by your credit card, and the only interview locations are in the north.
Hot Tip: NEXUS also allows you expedited access to and from Canada, whereas Global Entry only allows fast access back into the U.S.
How Does the Program Work?
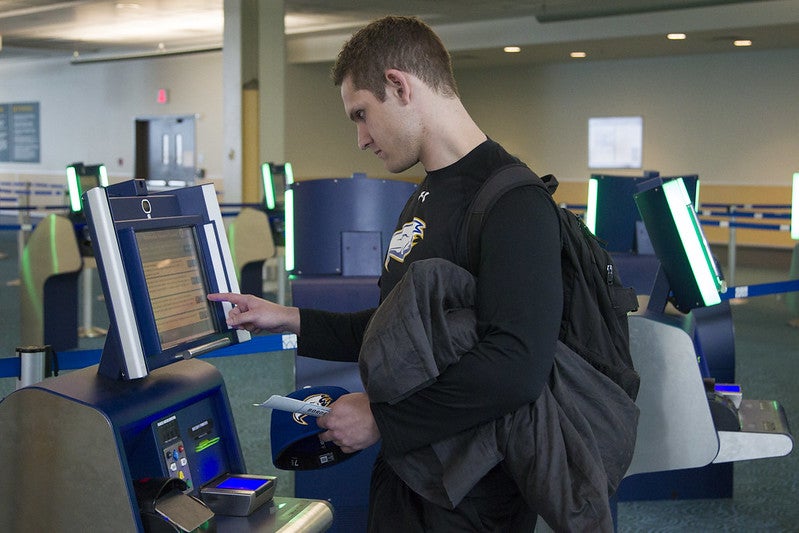
Image Credit: Donna Burton via U.S. Customs and Border Protection
To get started, you’ll first need to complete the application process to be added to the traveler database.
Once approved, you’ll take your passport (it must have embedded technology) or permanent residency card to the Global Entry kiosk at the airport upon your return from international trips. At the kiosk, you’ll need to swipe your passport and provide fingerprint verification.
After swiping, you’ll have to fill out an electronic customs declaration card. Once completed, you’ll receive a piece of paper telling you to either go to the baggage claim area or to see an agent at a booth.
If you’re a U.S. citizen, legal permanent resident, or Mexican national, you also get a card that allows you to enter at land and sea entry points, much like the passport card.
Note that this card cannot be used in place of your passport at airport kiosks. In addition, there don’t appear to be specific expedited lanes at any seaports, unless they’re equipped with NEXUS and SENTRI.
At these locations, this simply means you can use your Global Entry card in lieu of your passport.
When entering the U.S. from Mexico and Canada, your membership card allows you to utilize the SENTRI and NEXUS access lanes, but unfortunately, this does not work the other way around.
Bottom Line: Use a fast and simple kiosk to enter your information and customs declarations at airports. Also, get quick access back into the country via SENTRI and NEXUS from Mexico and Canada.
What Are the Requirements, Eligibility, and Restrictions?
The requirements begin with your nationality. If you’re a U.S. citizen, permanent resident, or citizen of one of the other participating countries listed above, you’re eligible for the program if you meet further requirements.
Of course, providing false information on the application is grounds for ineligibility. To gain access, you have to go through a very serious background check to make sure you’re a low-risk traveler. Additional requirements include:
- Not being convicted of criminal offenses and have no pending criminal charges or warrants
- Not being found in violation of any laws on agriculture relations, immigration, or customs
- Not being the subject of a current ongoing investigation
- Must be admissible to the U.S. under immigration regulation
- Must be able to prove your low-risk status to the CBP if they cannot immediately do so
Be aware that ineligibility involves things like DUIs, serious past arrests (but not all arrests), and other similar offenses.
There’s no minimum age requirement for access to the program, but if you’re under 18 you’ll need the consent of your parent or legal guardian. This person does not need to be a member themselves in order to allow your participation.
However, if you want to use the program with your family, you will each need to have your own membership (even babies).
The last step is to complete an in-person interview at one of the enrollment centers (a full list is provided further below) or a remote interview online via a new pilot program that began on June 1, 2021, if you qualify. This is a security interview to verify your low-risk status.
Bottom Line: Those of you with a clean background will have no trouble applying for the program. There are minimal requirements outside of having a passport and completing an interview.
What Are the Benefits? How Much Time Can I Save?
As a program member, the major benefit is being pre-approved to enter the U.S. from a variety of entry points (see list below) without having to endure the normal lines, which can take hours.
In addition, no paperwork is necessary since the customs form you fill out at the kiosk is electronic.
You also get joint access to other countries’ programs (NEXUS, SENTRI, and more), and you’re given eligibility to use TSA PreCheck, which allows you to skip normal airport security lines and save even more time while traveling.
To find out a little more about the time saved, you can look at data provided by the U.S. CBP.
Data for Chicago O’Hare International Airport (ORD) from August 2021 shows the average wait time was 21 minutes, with a maximum wait time of 70 minutes.
As a frequent traveler with this program, your wait time can be less than 1 minute: the time it takes you to walk to the kiosk and scan through. Do keep in mind that after passing customs, you still have to wait for bags like everyone else.
If you don’t check a bag, though, you’ll be on your way!
You can save a lot of time by not having to wait in line at customs, but note you’ll still have to wait for your bags as usual. Image Credit: Tooykrub via Shutterstock
Think of this program as an insurance policy to ensure you never have to wait longer than the time it takes to get your bags. After an international trip, would you be willing to pay a small fee instead of waiting in line for over 3 hours?
If you also consider the value of your included enrollment in TSA PreCheck, the time savings more than makes up for the application fee.
Bottom Line: Save an average of 15 minutes of wait time on each trip that requires passing through customs. In some cases, you could save several hours!
Which Countries Participate in the Program?
Besides the U.S., there are now 12 other countries that allow their low-risk citizens to enroll in the program:
- Argentina
- Brazil
- Canada (through the NEXUS Program)
- Colombia
- Germany (reciprocal with EasyPASS Program)
- India
- Mexico (reciprocal with Viajero Confiable Program)
- Panama (reciprocal with Panama Global Pass)
- The Republic of Korea (reciprocal w/ SES Program)
- The Netherlands
- Singapore
- Switzerland
- Taiwan
- United Kingdom (reciprocal with Registered Traveler Program)
Hot Tip:Even though you may have Global Entry status, this isn’t the same as obtaining a travel visa. Learn about the 4 types of travel visas, figure out whether you need one, and learn how to get it before booking a trip!
Global Entry Locations and Kiosks
There are 75 known airports with Global Entry kiosks. The map and table below show all the existing locations!
Global Entry Locations and Kiosks |
Abu Dhabi International Airport (AUH)*
|
Hartford – Bradley International Airport (BDL)
|
|
Anchorage – Ted Stevens International Airport (ANC)
|
|
|
Aruba – Queen Beatrix International Airport (AUA)*
|
Honolulu International Airport (HNL)
|
Pittsburgh International Airport (PIT)
|
|
Houston Hobby International Airport (HOU)
|
|
|
Indianapolis International Airport (IND)*
|
Providence – T.F. Green International Airport (PVD)
|
Bermuda International Airport (BDA)*
|
|
|
|
John Wayne Airport (SNA)*
|
|
Burlington International Airport (BTV)*
|
|
Saipan International Airport (SPN)*
|
Calgary International Airport (YYC)
|
|
|
|
Louis Armstrong New Orleans International Airport (MSY) |
San Antonio International Airport (SAT)
|
|
|
|
|
|
|
Cincinnati/Northern Kentucky International Airport (CVG)
|
Milwaukee – General Mitchell International Airport (MKE)
|
|
Cleveland Hopkins International Airport (CLE)
|
|
San Juan-Luis Muñoz Marin International Airport (SJU)
|
|
Montreal Pierre Elliott Trudeau International Airport (YUL)
|
|
|
|
|
|
Nassau – Sir Lynden Pindling International Airport, Bahamas (NAS)*
|
South Bend International Airport (SBN)*
|
|
New York – Stewart International Airport (SWF)*
|
Southwest Florida International Airport (RSW)*
|
Edmonton International Airport (YEG)
|
|
St. Louis Lambert International Airport (STL)* |
Fairbanks International Airport (FAI)
|
|
|
|
Ontario International Airport (ONT)*
|
Toledo Express Airport (TOL)*
|
|
|
Toronto Pearson International Airport (YYZ)
|
Grand Bahamas International Airport (FPO)*
|
Orlando-Melbourne International Airport (MLB)*
|
Vancouver International Airport (YVR)
|
Guam International Airport (GUM)
|
Orlando-Sanford International Airport (SFB)
|
|
Halifax Stanfield International Airport (YHZ)
|
Ottawa Macdonald-Cartier International Airport (YOW) |
Winnipeg James Armstrong Richardson International Airport (YWG)
|
* Locations with no enrollment centers
List of GE locations taken from CBP website
Which Airports Have Customs and Border Patrol Security Offices?
Before you apply, you should find out if there’s an interview location near you. You may also be interested in what other cities are available, in case you’re planning a trip and want to complete your interview while away from home.
If you’re not sure where the actual office is located inside the airport, simply ask any security personnel to point you in the right direction.
The following airports have CBP security offices that conduct interviews (listed by 3 digit IATA code):
Airports with Global Entry Enrollment Center Offices |
ANC |
CLT |
FLL |
LAX |
PDX |
SFB |
YOW |
ATL |
CVG |
GUM |
MCI |
PHL |
SFO |
YUL |
AUS |
DEN |
HNL |
MCO |
PHX |
SJU |
YVR |
BDL |
DFW |
HOU |
MIA |
PIT |
SLC |
YWG |
BNA |
DOH |
IAD |
MKE |
PVD |
TPA |
YYC |
BOS |
DTW |
IAH |
MSP |
SAN |
YEG |
YYZ |
BWI |
EWR |
JFK |
MSY |
SAT |
YHZ |
|
CLE |
FAI |
LAS |
ORD |
SEA |
YLH |
|
* Data taken from cbp.gov
Enrollment on Arrival
To reduce the wait times for interviews, CBP launched an initiative called Enrollment on Arrival. Passengers returning from trips abroad can now visit a dedicated booth where a CBP officer will process them as non-Global Entry passengers.
Once through the initial processing, the officer will conduct the interview and collect the necessary biometric data to finish the enrollment process.
Enrollment on Arrival is currently available at 65 airports, including 15 international locations:
Airports with Enrollment on Arrival |
Abu Dhabi-International Airport (AUH) |
Metropolitan Oakland International Airport (OAK) |
Aeropuerto Internacional Reina Beatrix Aruba (AUA) |
Miami International Airport (MIA) |
Austin-Bergstrom International Airport (AUS) |
Milwaukee General Mitchell International Airport (MKE) |
Baltimore/Washington International Airport (BWI) |
Minneapolis St. Paul International Airport (MSP) |
Boston Logan International Airport (BOS) |
Montreal-Pierre Elliot Trudeau International Airport (YUL) |
Buffalo Niagara International Airport (BUF) |
Newark Liberty International Airport (EWR) |
Calgary International Airport (YYC) |
Norman Y. Mineta San Jose International Airport (SJC) |
Charlotte Douglas International Airport (CLT) |
O’Hare International Airport (ORD) |
Chicago Midway Airport (MDW) |
Orlando International Airport (MCO) |
Cincinnati/Northern Kentucky International Airport (CVG) |
Orlando Sanford International Airport (SFB) |
Cleveland Hopkins International Airport (CLE) |
Ottawa International Airport (YOW) |
Dallas Fort Worth International Airport (DFW) |
Philadelphia International Airport (PHL) |
Denver International Airport (DEN) |
Phoenix Sky Harbor International Airport (PHX) |
Detroit Metropolitan International Airport (DTW) |
Portland International Airport (PDX) |
Dublin Airport (DUB) |
Raleigh-Durham International Airport (RDU) |
Edmonton International Airport (YEG) |
Reno-Tahoe International Airport (RNO) |
Fairbanks International Airport (FAI) |
Sacramento International Airport (SMF) |
Fort Lauderdale-Hollywood International Airport (FLL) |
Salt Lake City International Airport (SLC) |
Fresno Yosemite International Airport (FAT) |
San Antonio International Airport (SAT) |
George Bush Intercontinental Airport (IAH) |
San Diego International Airport (SAN) |
Grand Bahama International Airport (FPO) |
San Francisco International Airport (SFO) |
Halifax International Airport (YHZ) |
Seattle Tacoma International Airport (SEA) |
Hartsfield-Jackson Atlanta International Airport (ATL) |
Shannon Airport (SNN) |
Honolulu International Airport (HNL) |
L.F. Wade International Airport, Bermuda (BDA) |
John F. Kennedy International Airport (JFK) |
St. Louis Lambert International Airport (STL) |
John Glenn Columbus International Airport (CMH) |
Tampa International Airport (TPA) |
John Wayne International Airport (SNA) |
Ted Stevens Anchorage International Airport (ANC) |
Kansas City International Airport (MCI) |
Toronto Pearson International Airport (YYZ) |
Los Angeles International Airport (LAX) |
Vancouver International Airport (YVR) |
Louis Armstrong New Orleans International Airport (MSY) |
Washington Dulles International Airport (IAD) |
Luis Muñoz Marin International Airport San Juan (SJU) |
William P. Hobby Airport (HOU) |
Lynden Pindling Nassau International Airport (NAS) |
Winnipeg James Armstrong International Airport (YWG) |
Harry Reid International Airport (LAS) |
|
Other Office Locations: Outside the Airport
You may be able to get an interview at a location outside of the airports above. Contact CBP for more info.
Internationally, appointments are also available at non-airport locations in Canada (Belleville, NB, Lansdowne, ON, and Vancouver Urban Enrollment Center, BC) and Singapore (U.S. Embassy in Singapore).
Global Entry Application: How To Apply and What You’ll Need
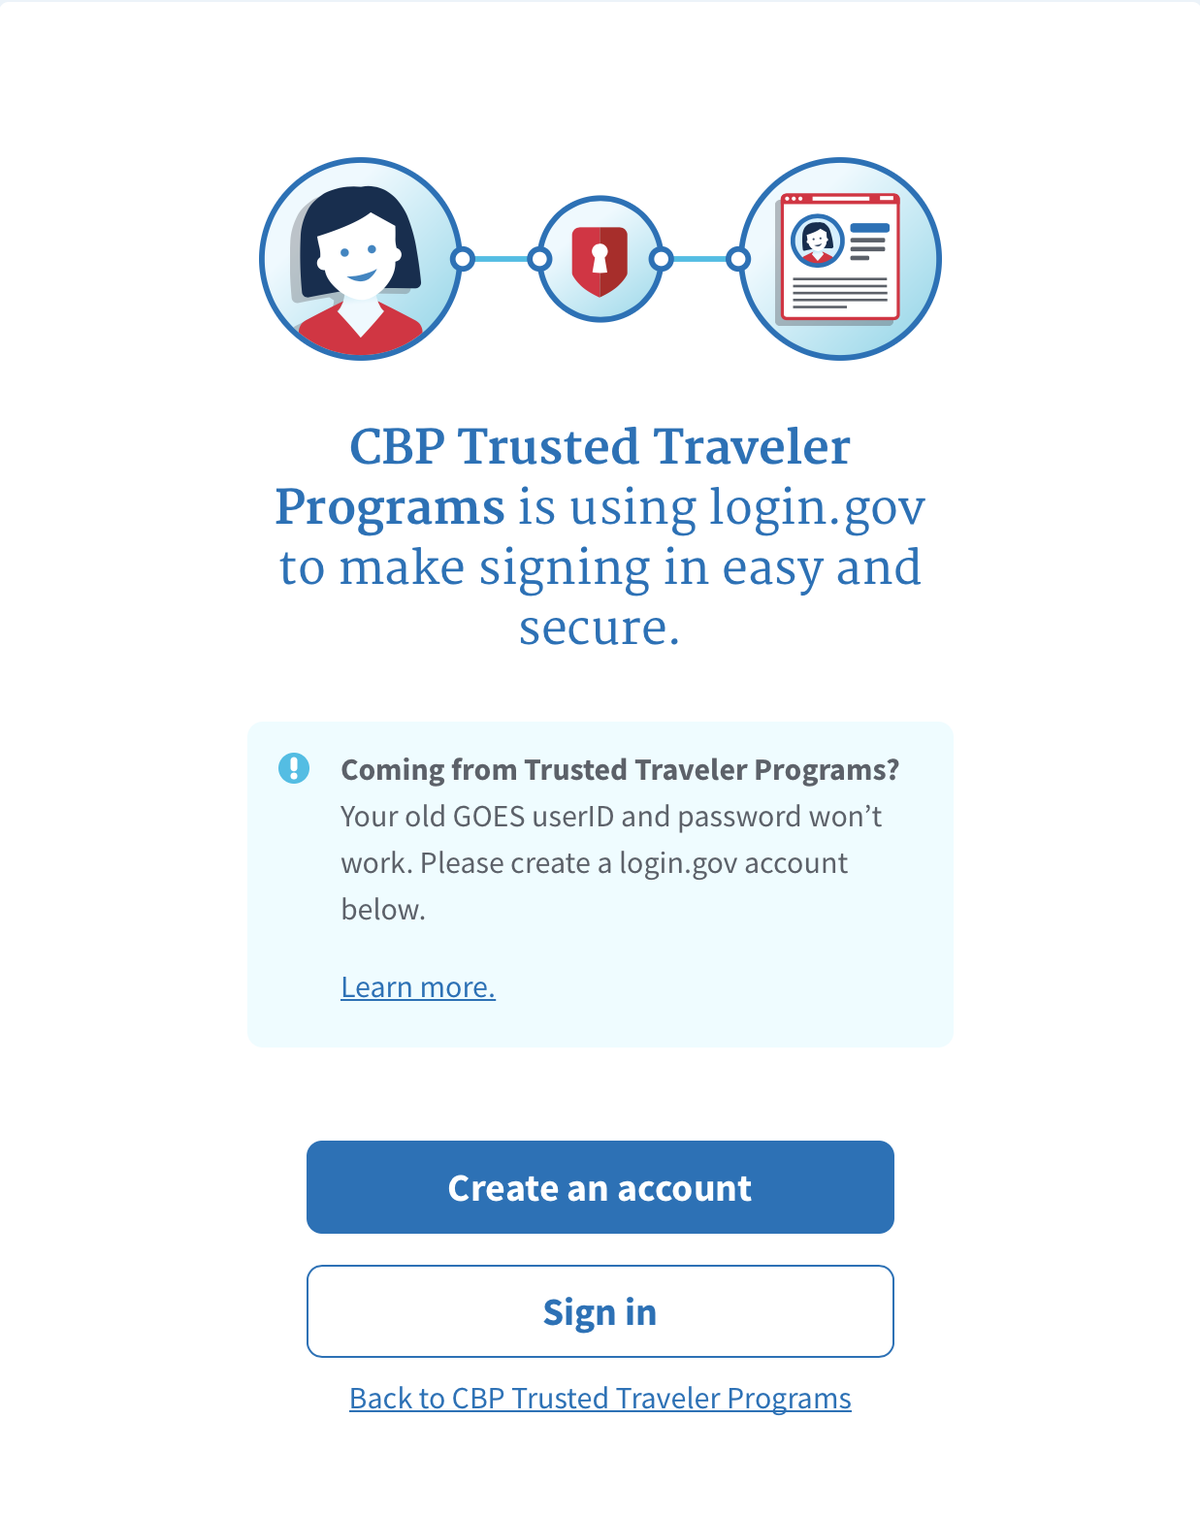
As of October 2017, the Department of Homeland Security (DHS) launched a new website to manage programs like Global Entry and TSA PreCheck. To apply for Global Entry, you’ll need to complete an application through this new Trusted Traveler Programs (TTP) website. There are 4 steps to get approved:
- Create a Login.gov account.
- Complete the application in the TTP system and pay the fee.
- Schedule your security interview (once conditionally approved) at 1 of the Enrollment Centers (listed below).
- Bring your passport (or permanent resident card) and 1 other form of ID to the in-person interview, along with a printout of your TTP application conditional approval letter.
If you already have Global Entry, you’ll need to create an account in the new system to keep your information updated, renew your membership, reapply when your membership expires, and more. More on that below.
You’ll need your current basic contact information to fill out the application, but you’ll also be asked for prior addresses for up to 10 years. This can be difficult if you’ve moved a lot and haven’t kept track.
Hot Tip: Create a document where you can save all your prior addresses every time you move. It’s easy to forget your past addresses, and these can be important for many instances in the future.
You’ll also need any prior names, your place of birth, passport number, employment history, and a list of foreign countries you’ve visited. The latter can also be difficult if you’ve traveled a lot and haven’t kept track.
Unlike the process for getting a passport, to apply for Global Entry you only need to have a couple of pieces of identification (1 of them a passport) and be able to fill out an online application.
However, there may be additional documents necessary on a case-by-case basis, including proof of current residency.
This requirement can be met with rent bills, utility bills, and other standard service documents that prove you live where you say you do.
Bottom Line: Apply online via the TTP system, pay the fee, and schedule your in-person interview. You only need your passport and 1 other form of ID along with a printout of your application. Other forms may be required on a case-by-case basis.
A Quick Step-by-Step Walkthrough
For the international traveler who wants to see a step-by-step walkthrough of the application process, you’re in luck! Here’s how it works.
Note: This process applies to new Global Entry applications. If you already have Global Entry or TSA PreCheck, skip down to see how to register for the TTP website.
Step 1: Navigate to the TTP Home Page
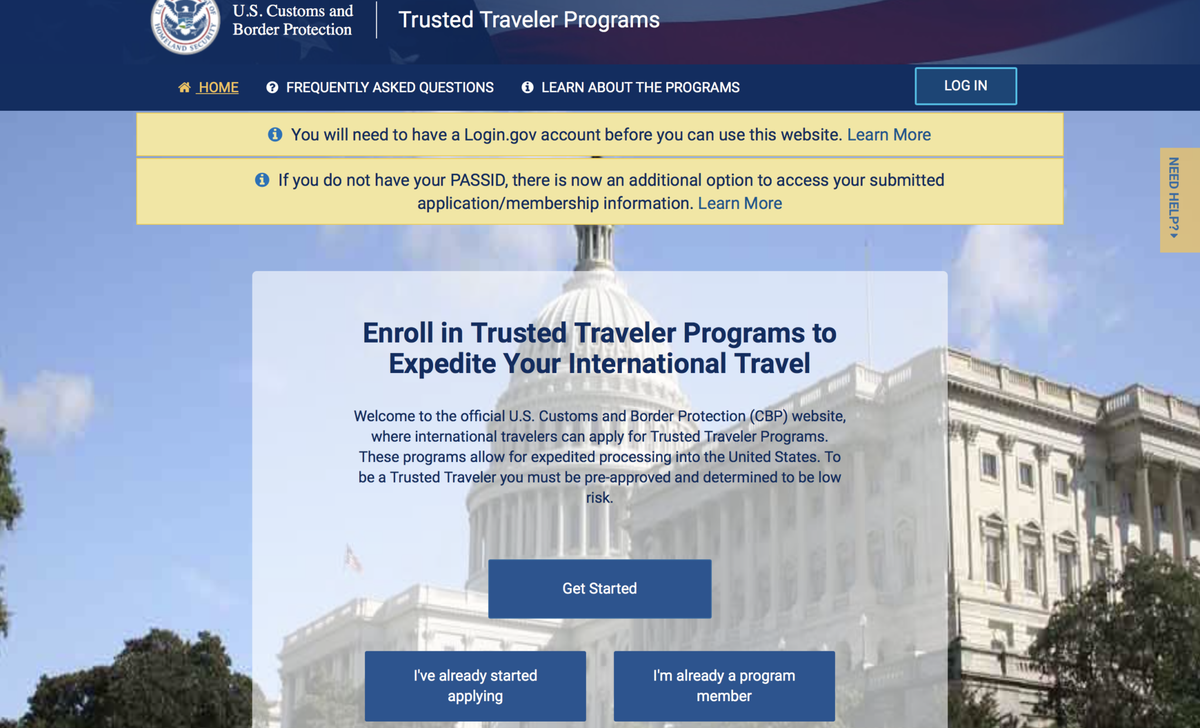
Visit the TTP homepage. For a new application, click Get Started. Read through the terms and click Consent & Continue.
Click Get Started to begin an application. Image Credit: U.S. Customs and Border Protection
Follow all the screens to go through your application. You can expect this process to take ~20 minutes if you have all the necessary information.
Step 2: Wait for Your Conditional Approval Status
After you fill out your application, getting approved is basically a waiting game. There’s no way to see what’s going on in the background of your application, speed up the process, or contact anyone to ask for information.
However, rest assured that your application is being processed, and once you’re conditionally approved, you’ll get a notification.
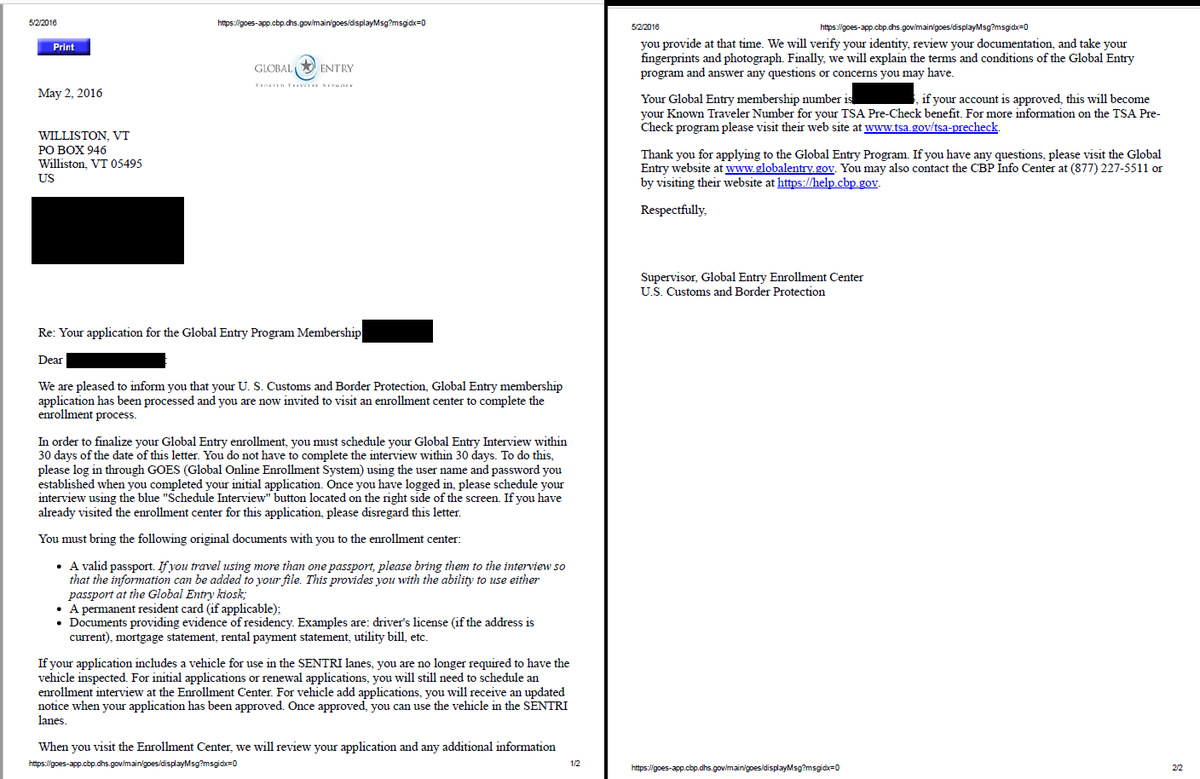
Here’s what the conditional approval letter will look like:
The Conditional Letter of Approval you’ll need to print out and bring with you to your interview. You must receive this before you can schedule an interview. Image Credit: U.S. Customs and Border Protection
Step 3: Schedule Your In-Person Interview
Now for the difficult part: you need to schedule your interview. In your online TTP account, you will see a button labeled Schedule Interview on the same line your conditional approval is on.
First, choose your closest Trusted Traveler Enrollment Center from the available list.
Hot Tip: Due to COVID-19’s impact on travel, you must schedule an interview within 24 months of your conditional approval, or risk having to reapply. You can modify it if necessary or try to find a better time.
Once your interview is scheduled, you will see the details on this interview screen. It will give you your scheduled interview time and the location of the Enrollment Center within the airport.
If you need to reschedule, make sure to do that through this screen! Don’t miss an interview, or you may have to reapply completely.
Use the tips below to speed up the Trusted Traveler Program interview process a bit.
Step 4: Attend Your Interview and Complete Your Application
The last step is simply to show up for your scheduled interview. Remember you’ll need the required information (passport, permanent resident card, other government ID, proof of residence) and your printed Conditional Approval Letter.
Interviews usually last about 15 minutes, during which you’ll be asked some questions (see below) and shown how to use the program.
Once you’re finished, final approval can be instantaneous, or it can come very soon after the interview.
Your final step is to activate your card once you receive it, which should take about 1 to 2 weeks. Visit the TTP login area and look for Activate my Card to complete this step.
After that, just be sure to add your Known Traveler Number (KTN) to all loyalty program profiles and every flight you take!
Re-registering for the Trusted Traveler Program’s Website
If you already have Global Entry, you’ll need to create a new profile on the TTP website in order to access your account, update your information, and more. It’s a simple process that takes about 10 minutes. Just follow the steps below.
Step 1: Navigate to the TTP Homepage.
From here, click I’m already a program member. After that, click the Manage My Membership button, followed by Consent & Continue.
Review the following page, then click Continue. You’ll be redirected to the Login.gov website to register.
Step 2: Create a Login.gov Account
Once the Login.gov site loads, click Create an account.
Create your account here. Image Credit: U.S. Customs and Border Protection
Enter your e-mail address, then check your e-mail for the verification message. Click the link in that e-mail to continue.
After you’ve clicked that link, choose a password. Make sure to keep a note of it!
Next, add your phone number. Login.gov will send you a verification code by text or automated phone call — as soon as you receive that code, enter it and click Submit.
Next, the website generates a security key you can use if you ever lose your password. Write it down and store it somewhere safe. Enter your key to verify that you have it, and then you’re done! Click Continue to go back to the TTP page.
Step 3: Enter Your Global Entry and Personal Information
Enter your personal information, including your name, place of birth, and birthday. Then, enter your PASSID or Global Entry membership number. Click Save and you’re all set!
How Long Does the Application Take?
Filling out the actual application doesn’t take long if you have previous addresses and other information handy. The long part of the process is waiting for approval and getting your security interview.
Do be aware that application approval for this frequent traveler program can take up to 4 to 6 weeks.
Again, remember that you won’t be able to communicate with anyone working on your application. All applications are sent directly through the TTP system, and you won’t be notified by phone or email when your status changes —just be sure to check the system daily to see if you’ve been approved.
After conditional approval, the next step is getting an interview. Securing an interview time can take up to 2 months as well, and you may even have to schedule a follow-up interview.
Once you’ve scheduled your interview, you do not need to reconfirm. If you end up getting an alternate time, be sure to reschedule or notify the Enrollment Center officer that you have a different interview time scheduled.
The interview itself shouldn’t take long. It’s usually under 30 minutes depending on your individual situation.
Bottom Line: Overall, the process averages between 2 and 6 months, although COVID-19 has led to significant delays. Once approved, you have access to the program for 5 years.
Tips for Speeding up Scheduling Your Interview
Many people report unreasonable wait times for these interviews. This is a popular program, and the CBP only has so many staff members to accommodate all the applications.
However, there are ways you can speed up the process as long as you’re flexible. Unfortunately for CBP, many people don’t show up for their interviews due to travel or other reasons.
These forfeited spots are prime times you can snatch up to secure your interview! Be sure to check the TTP system often to see what interview slots open up, and be ready to run to the airport for your interview.
Here are some tips for speeding up the process of getting an in-person interview:
- Check the interview appointment page as frequently as every 30 minutes. Changes are always happening; the more effort you put in, the quicker you’ll get your appointment. Keep the page open and refresh it periodically.
- Try a walk-in appointment. No matter where you are, as long as you have your interview scheduled at any location, you can always try a walk-in appointment in case there was a cancellation. This doesn’t always work, but it’s certainly worth a try.
- Schedule your interview for a city you are traveling to. This is a great way to take care of business while traveling.
- Note that interviews are only available during normal business hours. The CPB is a government organization, so you won’t find weekend appointments. Don’t try to do a walk-in on a Saturday.
- See if you qualify for a remote interview. If you’re renewing your membership you might qualify to do your interview remotely. See more details here about this new CBP pilot program that began in June 2021.
Bottom Line: Stay proactive in getting an appointment, and one will almost undoubtedly open up much sooner than your originally scheduled time.
The Interview: What Should I Expect?
Typically, interviews will not last longer than about 15 to 30 minutes.
Remember to bring all your necessary documents: you’ll need your printed conditional approval letter, valid passport, evidence of your residence (rent bills, utility bills, or other similar information), and a second valid U.S. government-issued ID (most people use their driver’s license).
Make sure to arrive at least 15 minutes early. Interviewers may be running ahead of schedule, and you might get in and out more quickly. Alternatively, if you miss your time, you’ll probably have to reschedule completely.
According to most reports, CBP officers are friendly and will ask you questions about your past and upcoming travels. The officer may ask you why you want the membership. Most people want membership to the program to make travel quicker and less stressful. This is a completely acceptable answer to the interview question.
Just be upfront and honest, since the officer likely knows everything about you, including any arrests or potentially risky behavior from your past. Be candid with them and discuss why you’re no longer a risk.
If you were conditionally approved, there’s no reason to be nervous, since you’re probably no longer a threat and will likely be approved. CBP has already done your background check and would’ve completely denied your application if it really wanted to.
The last thing you’ll have to do at the interview is give your fingerprints. Don’t be shocked when asked for this. Once your fingerprints are on file, you can use the kiosks to speed up your customs entry process.
You may be approved on the spot at the end of your interview, or it may take some time. In any case, you’ll get your card within a couple of weeks, and you should already have your Known Traveler Number from the TTP system from your conditional approval.
At the end of your interview, you get a training session on how to use the Global Entry kiosks. This includes showing you how to scan your machine-readable passport and fingerprints on both hands, as well as filling out the customs form.
Additional In-Person Interview Tips:
- Bring more information than you need. If the officer ends up asking for more, it’s always better to have it than not.
- Know your travel history, since the officer will ask you to confirm past trips. If you don’t recall a trip off the top of your head, at least discuss that with the interviewer.
- You’ll watch a short video explaining the rules.
- You will have your picture taken, so come looking your best if that matters to you.
- Once approved, your card will arrive in a couple of weeks with a protective sleeve to help prevent electronic theft.
- Don’t forget to activate your membership card as the very last step! Visit the TTP home page, click Activate Membership Card, and follow the prompts.
Bottom Line: Know your past, be honest, and know what information is on your application. The process should only take about 15 minutes, and then you’ll be done.
How to Use Global Entry at the Airport
Image Credit: Ozzy Trevino via U.S. Customs and Border Protection
After you’re all set up, using the program is easy. Simply walk up to the kiosks at the airport when you arrive from your flight. Scan your fingerprints and your passport, answer the on-screen questions, and pose for your photo.
You won’t need your actual card to get through the airport kiosks; just make sure to wait for your printout to finish the process.
These printouts are necessary at the next checkpoint in order to complete your entry (you have to hand them to a CBP officer before exiting), so don’t forget them.
Remember that skipping the customs line doesn’t mean your bags will be waiting for you right away, but at least you’ll get a spot in the front (bonus if you don’t have any checked bags!).
Once you’ve collected your bags and are ready to exit, you’ll have to go through the last checkpoint where you’ll need your printout. Here, too, you’ll see priority lines for Global Entry members.
Hot Tip: If you ever get an X on your receipt printout, take it to the nearest Passport Control Officer to get approval before moving on.
Getting Your TSA PreCheck
One of the best benefits of being a member is the fact that you will get access to TSA Known Traveler Program, called TSA PreCheck, as well, which expedites the security screening process.
The TSA PreCheck benefit is approved on a trip-by-trip basis if you don’t have an actual TSA PreCheck membership, and probably even if you do. Providing your Known Traveler Number on your travel ticket will put you into the TSA’s database to approve or disapprove TSA PreCheck.
To get TSA PreCheck, you have to be flying on an airline that participates in the program. While there are many airlines included, not all of them are:
TSA PreCheck Airlines
Aerolane Lineas Aereas Nacionales del Ecuador | Cape Air | Interjet | Southwest Airlines |
AeroMexico | Cathay Pacific Airways | Japan Airlines | Spirit Airlines |
Air Canada | China Airlines | JetBlue Airways | Sun Country Airlines |
Air Choice One | Condor Airlines | Key Lime Air | Sunclass |
Air France | Contour Aviation | KLM Royal Dutch Airlines | Sunwing Airlines |
Air India | Copa Airlines | Korean Air | Swift Air |
Air Serbia | Delta Air Lines | LAN Peru S.A. | Swiss International Air Lines |
Alaska Airlines | Eastern Airlines | LATAM Airlines | Swoop |
All Nippon Airways (ANA) | Edelweiss Air | Lufthansa | TAM-Linhas Aereas S.A. |
Allegiant Air | EL AL Israel | Norwegian Air | TAP Air Portugal |
American Airlines | Elite Airways | Omni Air International | Turkish Airlines |
Aruba Airlines | Emirates | PAL Express | Ultimate Jet Charters |
Asiana Airlines | Etihad Airways | Philippine Airlines | United Airlines |
Austrian Airlines | EVA Air | Porter Airlines | Virgin Atlantic |
Avianca | Finnair | Qantas | VivaAerobus |
Avelo Airlines | Flycana | Qatar Airways | Volaris |
Azul Airlines | Frontier Airways | Scandinavian Airlines | WestJet |
Boutique Airlines | Global Crossing Airlines | Seaborne Airlines | World Atlantic |
Breeze Airways | Hawaiian Airlines | Silver Airways | Xtra Airways |
British Airway | Icelandair | Singapore Airlines | |
Brussels Airlines | InterCaribbean Airways | Southern Airways Express | |
Hot Tip:You don’t need to remove shoes, laptops, liquids, belts, or light jackets when going through TSA PreCheck. For more questions, check out our TSA FAQ.
Renewing Your Membership
What happens after your 5 years are up? At this point, you’ll have to renew your membership. Renewing is not too difficult, and you can begin the process 1 year before your membership expires.
First, log into the Trusted Traveler Programs system (operated by Homeland Security), find the Manage Membership page, and select to renew your membership. When doing so, you’ll have to pay another $100 fee and update any information about yourself as applicable.
An updated security interview may or may not be required — this will be determined upon your renewal. Check back in your TTP account to see if there are any updates on what is required for your renewal.
Bottom Line: Renewal is similar to signing up: do it online and pay the fee. You can reapply 1 year before expiration and you may have to do a follow-up interview.
Program Caveats
For those with any criminal background or marred history, it’s likely not worth your time signing up. Even small glitches can disqualify you from participating in the program, which will cost you the nonrefundable $100 fee.
Trusted Traveler Program Comparison
Each trusted traveler program has its own merits and differences, and your unique situation might lend to 1 program over another. Image Credit: Department of Homeland Security
Which is the best program? You’ll have to decide for yourself. Each has its own pluses and minuses and it will depend on what type of traveling you are doing.
Global Entry vs. NEXUS
NEXUS is the border protection program between the U.S. and Canada, and having Global Entry allows you some of the benefits of NEXUS members.
To use the shared benefits of NEXUS, remember your Global Entry card is only good for entry back into the U.S. You’ll need to have a separate NEXUS membership to be able to skip these entry points on the way out of the country as well.
If you do have a full NEXUS membership, however, you get quick access both in and out of Canada in addition to full benefits of Global Entry (including TSA PreCheck).
This is an excellent deal, especially considering it only costs $50 for 5 years. The main caveat here is that all NEXUS enrollment centers are located in certain northern U.S. cities, so it might be harder to get to an appointment if you don’t live in one of those areas.
Hot Tip: For more in-depth info on this topic, check out our dedicated article: NEXUS Trusted Traveler Program – Applying, Eligibility, Benefits & More.
Global Entry vs. SENTRI
SENTRI is the U.S. and Mexico border protection program. Similar to NEXUS, to use the shared SENTRI benefits of border crossing back into the U.S., you must have your Global Entry card.
To gain access to the SENTRI lane into Mexico you have to have a full SENTRI membership. Visit a local SENTRI enrollment center to apply (located in Arizona, California, and Texas).
Global Entry vs. TSA PreCheck Program
TSA PreCheck is the U.S. Transportation and Security Administration’s expedited security lane at domestic U.S. airports. Having a TSA PreCheck membership allows you access, but you do not get Global Entry membership for having TSA PreCheck.
TSA PreCheck enrollment can be done here. Enrollment is similar: fill out the TSA PreCheck application, go through the interview process, and soon you’ll be on your way.
Hot Tip: Another service offering expedited airport is security is CLEAR. Read all about this program in our detailed post on the CLEAR expedited airport security program.
24 Quick Tips for Candidates
Obtaining membership can be a nerve-wracking process with all the background checks and unknowns. This list should help you understand the process better. Here are some tips we’ve collected through our own experience with the program and other research on the subject.
If you have any additional tips, please let us know!
- While they’re government employees dealing with security and may appear intimidating, the CBP officers are still people like us who appreciate common courtesy and respect. Refer to them as “Officer” and treat them like you would any other official. Remember that they aren’t personally trying to make your life difficult and they didn’t personally make the interviews difficult to get.
- While it can take many months to get an interview, staying on top of the process by proactively seeking an interview date can speed things up greatly.
- Make sure your frequent flyer or loyalty program profile name matches your name in Global Entry, or you will not be approved for TSA PreCheck.
- Having trouble scheduling an interview? Try looking for times at another local airport (see the list above) or traveling to a place with an interview office.
- Forget to add your Known Traveler Number to your itinerary? You can always add it afterward by calling the carrier or adding it online. This also applies if you book through an agency that doesn’t accept KTNs.
- If you want to bring your kids or other people with you through the priority Global Entry kiosk, each of them will have to have their own membership. In contrast, children 12 and under can go with you through TSA PreCheck even if they don’t have individual access.
- In rare cases, the kiosks may not be able to read your fingerprints. If fingerprint verification fails, you can still get priority access through the normal line.
- Don’t worry about filling out the customs form given to you on the flight if the airport has Global Entry. You will fill it out electronically at your kiosk.
- Even with membership, at times you may be randomly selected for an interview and bag check. This is normal and just part of trying to ensure security. Suck it up, cooperate, and you’ll be out quickly!
- When you get a new passport (whether through renewal or otherwise), you will need to update your information. You can update it via TTP. This also includes your driver’s license and any other applicable personal details. However, you will need to visit a CBP office to update your profile if you have a name or status change on your passport. In this case, it will cost $25 to get a new card. There is conflicting information about whether your membership expires when your passport expires (even from officers), but most people report that once they updated their profiles with the new passport they were fine.
- Membership cards count as a form of government-issued ID. Keep this in mind for cases where you may need multiple forms of ID.
- You have to input your KTN on all your travel info in order to use the program! If you don’t, you won’t be in the system for that trip. If you forgot, you can always add it before your trip. This is especially important in order to ensure you get TSA PreCheck.
- Check with your airline to ensure you’re opted-in to the TSA PreCheck program with them before you fly.
- You only need your physical membership card when traveling by land (car or train) or sea.
- Unfortunately, the fee doesn’t appear to show up as a travel-related purchase if you’re using a Chase Sapphire Preferred® Card.
- For reimbursement-eligible credit cards, you first must pay for the program on your card, and then the issuer will give you a credit for the same amount once approved.
- Don’t become complacent when answering the questions at the kiosk. If you answer no to everything all the time, you may look suspicious. Don’t lie, because if you’re caught, you’ll be kicked out and subject to any other applicable penalties.
- Maximize usage by planning your travels around the airports that have Global Entry kiosks.
- Always check your ticket to see if you’re approved for TSA PreCheck. It’s not guaranteed for every trip, and you’ll see your status there. This will save you from getting into the wrong security line since you won’t be allowed through if you don’t have it for that particular trip.
- Lost or stolen card? You can order a replacement online via the TTP system. You may be required to do another interview and pay $25 for a new card.
- Application denied? You may be able to reapply — contact the nearest Trusted Traveler Enrollment Center or write a letter.
- Read over the other common questions people have about the program.
- You can have a third party do all the application and processing for you. You just need to show up for the interview.
- Make sure your name on your passport matches the name on the application exactly. Problems have occurred with some people who don’t match. If you have a first, middle, and last name on your passport, include those on your application.
Final Thoughts
Those who travel a lot and don’t mind doing a little work upfront will find the program a refreshing way to skip lines that may be irksome after a long day of travel.
With multiple ways to get your membership paid for and a moderate fee of $100 for 5 years, you get a useful travel tool that doesn’t break the bank.
Adding in the value of TSA PreCheck along with the NEXUS and SENTRI Trusted Traveler Programs will make your travels just a bit more enjoyable!
For even more info, check out our piece on the top FAQs for the Global Entry Program.
For rates and fees of The Platinum Card® from American Express, click here.
For rates and fees of The Business Platinum Card® from American Express, click here.
Like this Post? Pin it on Pinterest!